

Video
Abstract
For our final project, we created a virtual reality viewer for scenes generated from neural radiance fields (NeRFs). Our inspiration for this project came from our curiosity about the possible use cases of NeRF in user applications, in addition to its performance. We thought that building a VR viewer for NeRFs was a natural choice, as a VR application would allow a user to view the scenes generated by a NeRF in a highly immersive environment.
Technical Summary
To create this application, we began with two major already-existing code libraries: Instant-NGP and OpenVR. OpenVR is a code library that allows you to communicate with and display graphics to a virtual reality head-mounted display. Instant-NGP is a high-performance graphics library that includes code to train and query images from a NeRF. We chose Instant-NGP over other NeRF Renderers for its performance and Python API.
The basic pipeline of our NeRF VR viewer is as follows:
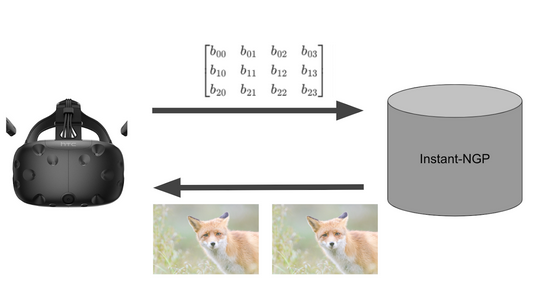
During runtime, an OpenVR script initializes and obtains the headset’s current position and orientation in space. It sends this data as a camera matrix over a named pipe to our Instant-NGP script. To use this camera matrix, we first resolve the differences between the Instant-NGP and OpenVR camera coordinate systems. Instant-NGP then generates an image from a trained NeRF model and sends the queried image as bytes to the VR headset. This image data is interpreted by our OpenVR script and is used to create an OpenGL texture, which is then applied to a VR overlay (or, in the case of stereo, submitted to both eyes via the OpenVR compositor). This overlay is placed in front of the user’s eyes in VR.
This entire process repeats in a loop until the program is terminated.
Technical Details - Named Pipes
To enable interprocess communication we decided to use named pipes, which allow programs to read and send bytes in a server-client relationship. During runtime the OpenVR script and Instant-NGP engage in a connection handshake, ensuring that both programs are ready to receive and send their respective information. This handshake is modeled below.
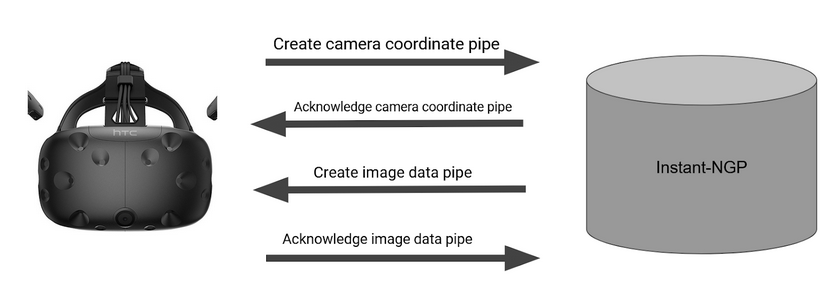
It is crucial that the OpenVR script waits for a client connection from Instant-NGP before connecting to the Instant-NGP server. Named pipes will throw an error if attempting to connect to a non-existent server. The data must also be converted into a byte format when sent through the pipe, then re-converted back into a usable format in the respective programs.
Technical Details - Camera Data Transformation/Conversion
OpenVR and Instant-NGP use different coordinate systems. In OpenVR, the camera is oriented toward the negative z direction, positive x is towards the right, and positive y faces up. However, in Instant-NGP, the coordinate system has the z axis reversed relative to OpenVR. Therefore, we had to find a way to transform between the two systems to ensure that we could accurately track the Instant-NGP camera’s movements to the movements of the VR headset.
Both systems use similar matrix conventions to define the camera positions; they use 3x4 matrices where the first 3 columns define the x, y, z rotation and the 4th column describes an xyz translation from the origin.
$$\begin{bmatrix} \rule[-1ex]{0.5pt}{2.5ex} & \rule[-1ex]{0.5pt}{2.5ex} & \rule[-1ex]{0.5pt}{2.5ex} & x_{pos}\\ X_{rot} & Y_{rot} & Z_{rot} & y_{pos}\\ \rule[-1ex]{0.5pt}{2.5ex} & \rule[-1ex]{0.5pt}{2.5ex} & \rule[-1ex]{0.5pt}{2.5ex} & z_{pos}\\ \end{bmatrix}$$
When transforming from headset-space to NeRF-space coordinates, we first need to negate the relevant axes so both systems move in the same direction. Given the headset position matrix, we can do this by negating the translation vector, as well as the relevant rotation columns. However, in implementation, the Instant-NGP code processes the camera position matrix by negating certain rotation vectors. Therefore, we found that we only needed to negate the x and z rotation vectors to correct these axes. We were able to achieve these negations by multiplying the headset position elementwise with a negation matrix:
$$ \begin{bmatrix} -1 & 1 & -1 & -1\\ -1 & 1 & -1 & -1\\ -1 & 1 & -1 & -1 \end{bmatrix} $$
We then wanted to make sure that the viewer always started in the same orientation in NeRF-space. We started by defining an initial camera matrix that we thought was a good starting point. For us, that was:$$ \begin{bmatrix} 1 & 0 & 0 & 0\\ 0 & -1 & 0 & 0\\ 0 & 0 & 1 & 0 \end{bmatrix} $$
where only the first 3 columns represent the rotation. Then, using \(H\) to represent the initial headset rotation and \(C_{init}\) as the initial camera rotation, we can simply find a transform between headset space and NeRF space:
$$ X\cdot H = C_{init}$$ $$ X\cdot H\cdot H^{-1} = C_{init}\cdot H^{-1} \\ $$ $$ X = C_{init}\cdot H^{-1} \\ $$
For every subsequent headset position \(H_t\), we multiply \(X \cdot H_t\) to get the headset rotation in camera space.
To calculate the translation, we multiply the headset’s xyz position by a passed in scaling factor to account for the difference in scale between the headset coordinate system and the NeRFs. We rotate it using the same transformation matrix \(X\) to acount for the difference in coordinate systems. We then concatenate this to the calculated headset rotation in camera-space.
$$ \begin{bmatrix} & x_{pos} * t\\ X\cdot H & y_{pos} * t\\ & z_{pos}*t \end{bmatrix} $$
For one final implementation detail, when processing the view matrix, the Instant-NGP code cycles the rows up by one row in order to convert the matrix into a format understandable by the inner NeRF code. Therefore, we cycle our matrix down by one row to keep the axes in the correct order after processing.
$$ \begin{bmatrix} X\cdot H[2] & z_{pos}*t\\ X\cdot H[0] & y_{pos} * t\\ X\cdot H[1] & x_{pos} * t \end{bmatrix} $$
Technical Details - Stereo Imaging
To implement stereo imaging, we must calculate a view matrix for each eye and use them to render an image from each eye. We can then send those images to the headset to be viewed as a stereo pair.
We first use the OpenVR method getEyeToHeadTransform() to find the position of each eye relative to the headset position in object space. We then rotate these eye offsets by the headset rotation and add them directly to the headset position to get the eye positions in world space.
To achieve the effect of stereo 3D, we need to converge the view direction of each eye to focus on a common point. This is accomplished by adding a parameter for the focusing distance of the eyes, \(x\). Knowing the Interpupillary Distance, \(IPD\), we can set up a diagram representing the view direction of the eyes. Here, \(f\) is the point at which the eyes are focused, \(\theta\) is the amount by which the eyes must be rotated, and \(l\) and \(r\) are the left and right eye positions respectively.
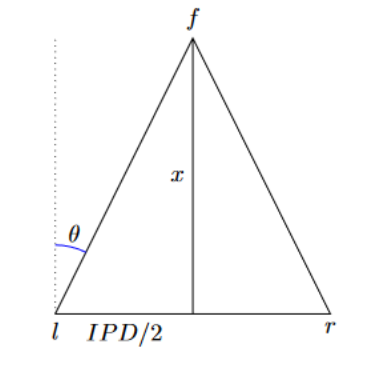
We can then solve for \(\theta\) using triangle equations:
$$\theta = \arcsin{(\frac{IPD/2}{\sqrt{(IPD/2)^2 + x^2}})}$$
To converge the eyes we multiply the rotation of the left eye by a rotation matrix about the y axis of \(-\theta\) and the right eye by \(\theta\).
To sync the image for each eye we made sure that the images for each eye were rendered using the same headset pose. On program startup the initial headset pose is first sent to Instant-NGP to calculate the transform matrix. Both eye positions are then calculated and sent to Instant-NGP. These are used to render two images which are sent to OpenVR, and this process continues until program termination.
Technical Details - OpenGL Texturing
To use the image bytes obtained from Instant-NGP, the image must first be converted into an OpenGL texture. First an OpenGL context is defined to store the state associated with the OpenGL instance. Then the byte array is converted into a usable structure utilizing multiple for loops. This creates a nested list structure, where the innermost list corresponds to the pixel data, the next list is the image row, and the outermost list is the complete image. The alpha values are discarded during this step.
$$ \begin{bmatrix} r_{1} & g_{1} & b_{1} & a_{1} & \dots & r_{w*h} & g_{w*h} & b_{w*h} & a_{w*h} \\ \end{bmatrix} \to \begin{bmatrix} \begin{bmatrix} \begin{bmatrix} r_{0} & g_{0} & b_{0}\\ \end{bmatrix} & \dots & \begin{bmatrix} r_{w - 1} \hspace1ex & g_{w-1} \hspace1ex & b_{w-1}\\ \end{bmatrix}\\ \end{bmatrix}\\ \begin{bmatrix} \begin{bmatrix} r_{w} & g_{w} & b_{w}\\ \end{bmatrix} & \dots & \begin{bmatrix} r_{2*w - 1} & g_{2*w - 1} & b_{2*w - 1}\\ \end{bmatrix} \end{bmatrix}\\ \\ \vdots \\ \\ \begin{bmatrix} \begin{bmatrix} r_{w*(h-1)} & g_{w*(h-1)} & b_{w*(h-1)}\\ \end{bmatrix} & \dots & \begin{bmatrix} r_{w*h} & g_{w*h} & b_{w*h}\\ \end{bmatrix} \end{bmatrix}\\ \end{bmatrix} $$
Converting the reorganized data into an OpenGL texture is achieved by calling glTexImage2D() on the image bytes and binding the texture to an OpenGL ID. We account for minification and magnification cases by using a linear sampler.
Technical Details - VR Overlay/Compositor
A VR overlay represents a 2D plane set in the 3D scene. In mono-imaging, the NeRF scene is rendered onto a 2D overlay that is positioned to be right in front of the viewing angle. The overlay follows the user’s movements exactly, appearing at the same place in their field of view at each frame.
To project the image onto the overlay we call the OpenVR function SetOverlayTexture() which applies the texture generated in the previous step to an overlay plane. Then to position the overlay correctly we call SetOverlayTransformTrackedDeviceRelative(), which applies a transform to the overlay relative to the headset.
We define a transform that places the overlay just in front of the user’s eyeline at all times. Because the transform is relative to the head, the overlay plane appears in the same spot in the user’s field of view in every frame. Since the 2D image changes in response to user movements in a way that is consistent with 3D perspective, it creates the illusion of a 3D scene.
In stereo imaging, we instead submit an image for each eye to OpenVR’s compositor. Instead of applying a texture to an overlay for the user to view, we apply the texture directly onto each eye display. This allows for two different textures to be viewed simultaneously. Using the compositor does come with some drawbacks, notably if the texture is not updated at a high enough frame rate it will begin flickering.
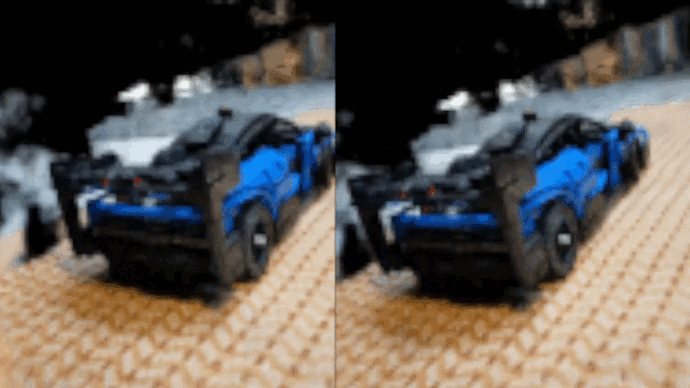
Final Results
Benchmarks
| Scene | Mono | Stereo |
|---|---|---|
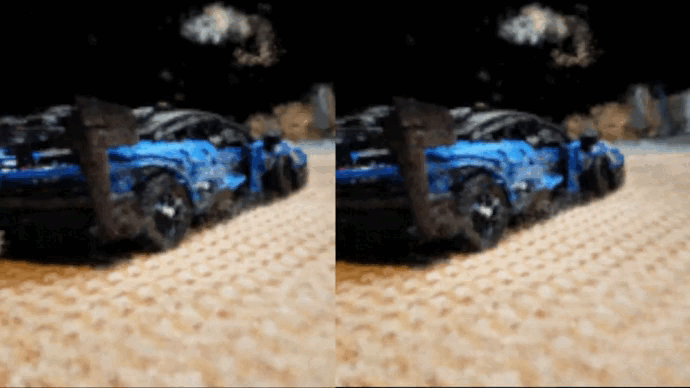
| Lego Car | ~4 fps | ~2 fps |
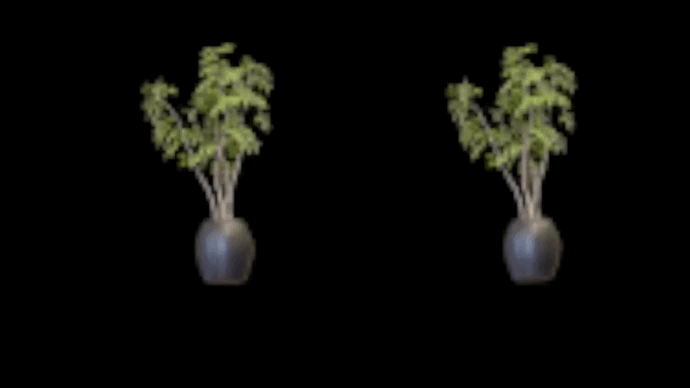
| Ficus | ~9 fps | ~4 fps |
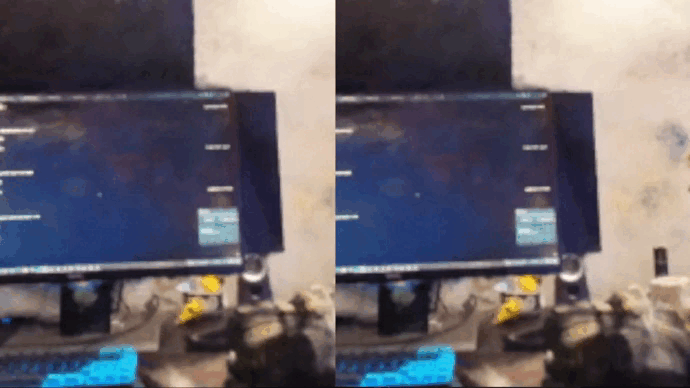
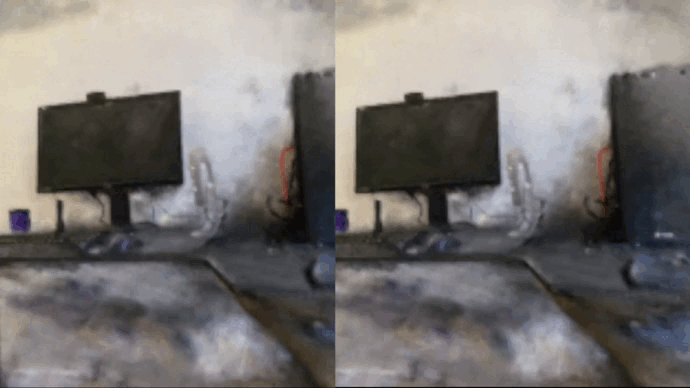
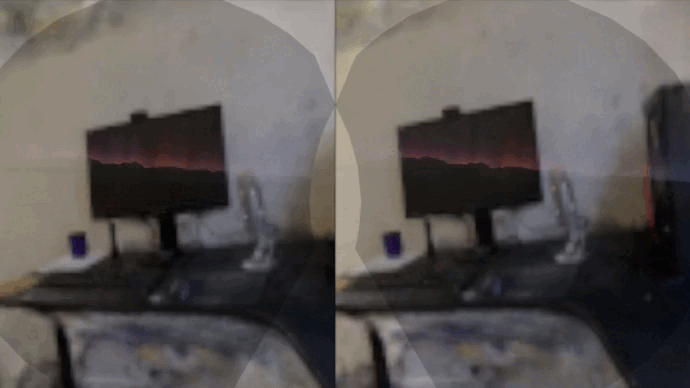
| Desk | ~3-4 fps | ~1-2 fps |
Mono
 |
|
 |
 |
 |
|
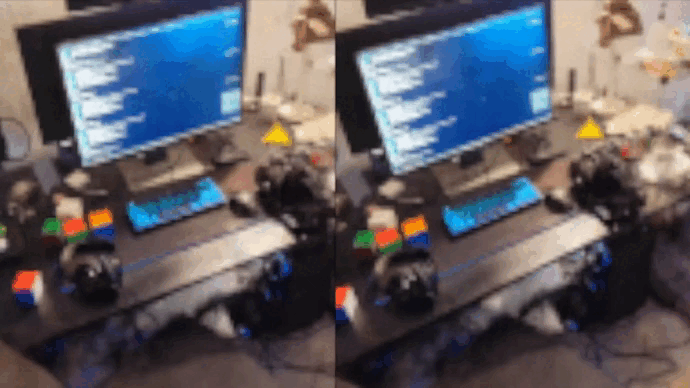
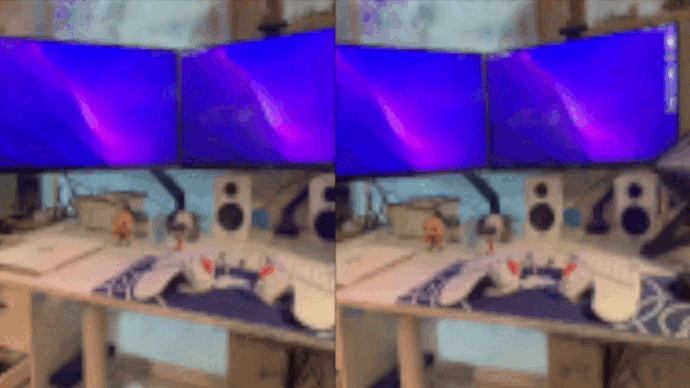
Stereo
| |
 |
|
 |
 |
 |